Under hood light bars are essential accessories for car enthusiasts, mechanics, and anyone who often works on their vehicles. They provide ample illumination, making it easier to diagnose problems and perform repairs, especially in low-light conditions. This DIY installation guide will walk you through the process of installing an under hood light bar, ensuring you have the information and confidence needed to complete the project successfully.
Benefits of Installing an Under Hood Light Bar

Before diving into the installation process, let’s explore why an under hood light bar is a valuable addition to your vehicle:
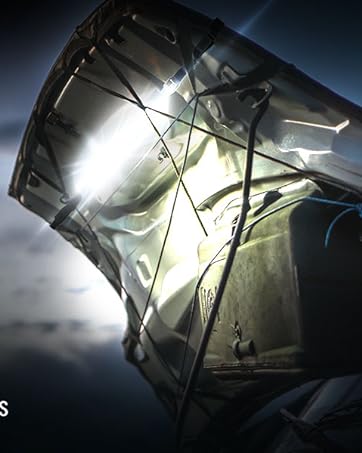
- Enhanced Visibility: Provides bright, focused light on the engine bay, making it easier to see and access components.
- Saves Time: Quickly diagnose issues without fumbling in the dark, which can lead to wasted time and frustration.
- Improves Safety: Reduces the risk of accidents or injuries while working on your vehicle by illuminating potentially dangerous areas.
- Customizable Options: Available in various sizes, brightness levels, and designs to suit your specific needs and preferences.
Tools and Materials Needed
Before you start the installation, gather the following tools and materials:
- Under hood light bar (LED recommended for longevity and efficiency)
- Drill with drill bits (appropriate size for mounting hardware)
- Wire strippers and connectors
- Electrical tape
- Zip ties (for securing wires)
- Wrench set
- Screwdriver set
- Multimeter (for checking electrical connections)
Step-by-Step Installation Process

Step 1: Choose the Right Location
Selecting the optimal location for your under hood light bar is crucial. Here are a few tips to consider:
- Locate a spot that is clear of any moving parts, such as belts and hoses.
- Ensure that the area has solid mounting points, such as existing holes or brackets.
- Consider the length of the light bar and how it will fit within the confines of your engine bay.
Step 2: Prepare the Surface
Before mounting, clean the surface area where the light bar will be installed. This ensures a better bond for any adhesive components and keeps the area free from dust and grease.
Step 3: Mount the Light Bar

Using your drill, carefully create holes for the mounting hardware. Secure the light bar using screws, bolts, or brackets provided with your light bar kit. Make sure it is firmly attached to avoid any movement during operation.
Step 4: Wiring the Light Bar
Wiring is a critical step in the installation process. Follow these guidelines:
- Identify the power source: You can wire the light bar to the vehicle’s battery or connect it to the fuse box.
- Use a multimeter to check for the correct voltage and ensure the power source is suitable for your light bar.
- Strip the ends of the wires and connect them using connectors, securely covering them with electrical tape.
- Route the wires neatly along existing wiring harnesses or through the engine bay to prevent any interference with moving parts.
- Use zip ties to secure loose wires, keeping them organized and out of the way.
Step 5: Test the Light Bar

Once everything is connected, test the light bar to ensure it is functioning correctly. Turn on the vehicle and activate the light bar. If it does not turn on, double-check your connections and power source.
Step 6: Final Adjustments
If the light bar is operational, make any necessary adjustments to its positioning for optimal illumination coverage. Ensure that it does not obstruct any engine components or maintenance areas.
Maintenance Tips for Your Under Hood Light Bar
To ensure longevity and optimal performance, follow these maintenance tips:
- Regularly Inspect Connections: Periodically check the wiring and connections for any signs of wear or corrosion.
- Keep the Light Bar Clean: Dust and debris can accumulate on the light bar, diminishing its brightness. Clean it regularly with a soft cloth.
- Check for Damage: Inspect the light bar for any cracks or damage that could affect performance. Replace as necessary.
Case Studies: Successful Installations

Many DIY enthusiasts have successfully installed under hood light bars, benefiting greatly from their enhanced visibility. For example, John, a weekend mechanic, reported that his installation allowed him to complete engine repairs at night without the need for handheld flashlights. This not only saved time but also improved the accuracy of his work.
Another case involves Sarah, who frequently camps off-road. She installed a light bar to help with engine maintenance during her trips. Sarah noted that the light bar provided crucial visibility for repairs, making her camping experience much more enjoyable and stress-free.
Statistics Supporting DIY Installations
According to a recent survey conducted by the Automotive Aftermarket Industry Association (AAIA), 65% of vehicle owners prefer to perform their maintenance and repairs. This statistic highlights the growing trend of DIY car care, emphasizing the importance of tools and accessories like under hood light bars that make these tasks more manageable.
Installing an under hood light bar can significantly enhance your vehicle maintenance experience, providing the illumination needed to tackle repairs efficiently. By following this DIY installation guide, you’ve learned the benefits, tools required, and step-by-step process necessary to install your light bar successfully.
Remember to maintain your light bar and perform regular checks to ensure it remains in optimal condition. With the right setup, you can enjoy a well-lit engine bay, making your vehicle care tasks safer and more effective. Empower yourself with the knowledge and skills to improve your automotive experience—your future self will thank you!


